Creating Transparent Gif's with ColdFusion 8 - Part 1
When I first read about ColdFusion 8, I was very excited to hear it supported creating GIF images. I have since noticed that it does not support creating new transparent GIF's, only modifying existing ones. Though I do not know if this is a limitation of ColdFusion or the underlying JRE. Now while I usually use PNG's, occasionally I need to create transparent GIF's. So for my own edification I have been experimenting with how to create transparent GIF's using ColdFusion 8.
My first attempts were spectacular failures. Either the background of the image was rendered as completely black or it assumed whatever color I used when calling ImageSetDrawingColor(). Eventually I found an excellent post on the sun forums, by PaulFMendler, that demonstrates how to make a GIF transparent using java. Using this as a guide, I was able to port this technique to ColdFusion.
Three things you should know about GIF's
Before we get into the code, there are three things you should know about GIF's. Now I myself am not an expert on image formats, so feel free to mention any inaccuracies here. But as I understand it- GIF's use what is called an IndexColorModel. This model uses a fixed map of colors, storing the red, green, blue and alpha components for each color index separately.
- GIF's are limited to 256 colors. This means the size of its color map cannot exceed 256.
- GIF's only support binary transparency. A color is either completely opaque or completely transparent. There is nothing in between. This is distinctly different than other formats, like PNG, which do provide support for semi-transparent or transluscent colors.
Can you walk me through that again? (In English this time)
An easy way to demonstrate the IndexColorModel is to create a simple opaque GIF, with two colors.
<cfset img = ImageNew("", 600, 300, "rgb")>
<!--- draw a blue rectangle on the left --->
<cfset ImageSetDrawingColor(img, "blue")>
<cfset ImageDrawRect(img, 0, 0, 300, 300, "true")>
<!--- draw a yellow rectangle on the right --->
<cfset ImageSetDrawingColor(img, "yellow")>
<cfset ImageDrawRect(img, 301, 0, 300, 300, "true")>
<cfset ImageWrite(img, ExpandPath("blue_yellow.gif"))>
<!--- display the image --->
<img src="blue_yellow.gif"><br>
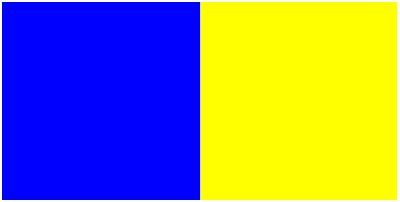
The code above will produce this image of two squares: one blue, one yellow.

Now let us examine the color model. First we load the saved GIF and extract the underlying BufferedImage. Then we extract its IndexColorModel and the size of the color map.
<cfscript>
  sourceImage = ImageGetBufferedImage(ImageNew(ExpandPath("blue_yellow.gif")));
  sourceModel = sourceImage.getColorModel();
  colorSize = sourceModel.getMapSize();
</cfscript>
Since this color model stores color components in bytes, we must first construct byte arrays to store the extracted values. We will create the array using a modification of an old tip from Christian Cantrell's blog. I chose to use a multi-dimensional array here, but you could create separate arrays if you prefer.
<cfscript>
  byteClass = createObject("java", "java.lang.Byte").TYPE;
  reflectArray = createObject("java","java.lang.reflect.Array");
  dimen = [ 4, colorSize ];
  colors = reflectArray.newInstance( byteClass, javacast("int[]", dimen) );
</cfscript>
Next, we pass our byte arrays to IndexColorModel. Each method copies the values for one of the color components into the supplied arrays.
<cfscript>
  sourceModel.getReds( colors[1] );
  sourceModel.getGreens( colors[2] );
  sourceModel.getBlues( colors[3] );
  sourceModel.getAlphas( colors[4] );
</cfscript>
Finally we examine the color map, by looping through the arrays. Since the values are stored in bytes, we will use the BitAnd function to convert them to integers for easy viewing.
<cfscript>
  for (x = 1; x LTE colorSize; x = x + 1) {
      red = BitAnd( colors[1][x], 255);
      green = BitAnd( colors[2][x], 255);
      blue = BitAnd( colors[3][x], 255);
      alpha = BitAnd( colors[4][x], 255);
      WriteOutput("r,g,b,a at index["& x &"] = "& red &","& green &","& blue &","& alpha &"<br>");
  }
</cfscript>
If you examine the results, you will see the model contains only two colors. The alpha value for both is 255, because the colors are opaque. Remember GIF's support only fully opaque (alpha = 255) or fully transparent (alpha = 0) colors.
  r,g,b,a at index[1] = 0,0,255,255  (blue)
  r,g,b,a at index[2] = 255,255,0,255 (yellow)
To find the color index of a specific pixel, we can use the image Raster. Since image colors may not be exact, due to dithering, the getSample() method is usually more reliable than searching the color map directly.
So using the getSample() method, we pass in the x and y coordinates, and desired color band. Our image has one color band, though some image types have three or four. Since java arrays are zero based, we pass in a band value of zero, not one.
<cfscript>
   raster = sourceImage.getRaster();
   index = raster.getSample( javacast("int", 0), javacast("int", 0), javacast("int", 0));
   WriteOutput("color map index of coordinates x=0, y=0 is ["& index &"]
");
   index = raster.getSample( javacast("int", 301), javacast("int", 0), javacast("int", 0));
   WriteOutput("color map index of coordinates x=301, y=0 is ["& index &"]
");
</cfscript>
As you can see from the results, the Raster correctly reports first pixel is color index [0] (blue) and the second pixel is [1] (yellow).
  color map index of coordinates x=0, y=0 is [0]
  color map index of coordinates x=301, y=0 is [1]
Did you catch the discrepancy?
Now the observant may have noticed the index values in the first example were 1 and 2. Whereas the index values in the second example are 0 and 1. Why? Java arrays are zero-based, but accessing arrays from ColdFusion, the index always starts at 1. So be sure to remember that when passing values between the two, or you may unintentionally introduce bugs!
That is enough about GIF's for now. Time for me to take a break. In Part 2 I will show how to make a GIF disappear .. transparent with ColdFusion 8.


0 comments:
Post a Comment